
Desserts
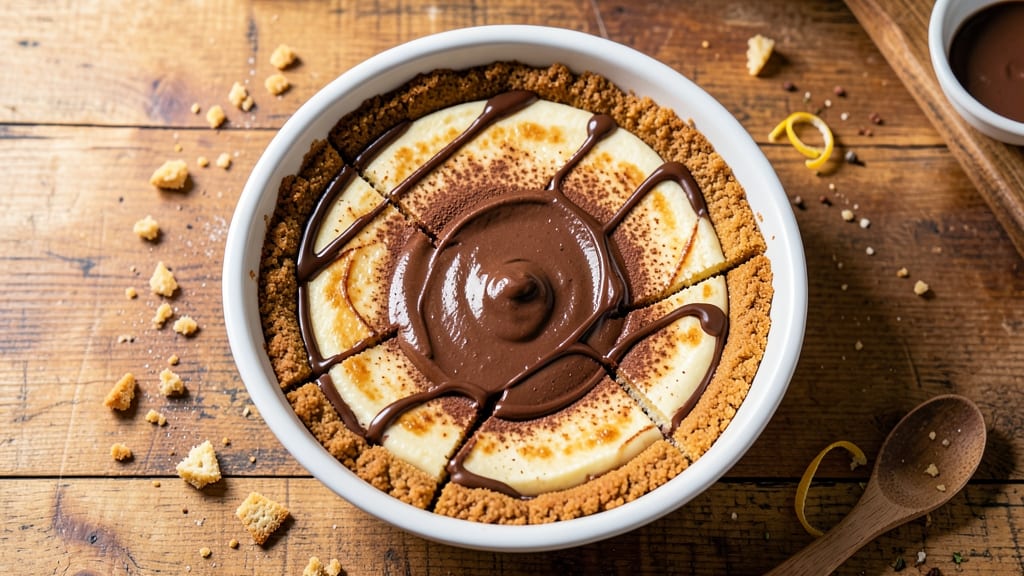
This Boston chocolate cream pie cheesecake recipe combines two iconic desserts into one decadent masterpiece—crispy layers of coffee-infused custard and velvety chocolate cheesecake.
The secret lies in balancing traditional techniques with modern twists, like a buttery graham cracker crust and a coffee-infused custard layer that adds depth without overpowering the rich chocolate filling.
I developed this recipe after years of perfecting individual components, ensuring each bite delivers the perfect harmony of textures and flavors.
The process starts with a foolproof graham cracker crust that bakes until golden and crisp, providing the ideal base for the layered fillings.
Between the crust and cheesecake comes the coffee-infused custard—a nod to Boston cream pie’s signature flavor—while the top layer is a luscious chocolate cheesecake that stays silky and rich.
What makes this recipe stand out is the careful balance of temperatures and baking times, ensuring the custard sets just right while the cheesecake remains velvety.
By the time you plate this dessert, you’ll have a showstopper that’s restaurant-quality—crispy at the edges, creamy in the center, and infused with just the right amount of coffee flavor.
The combination of textures and flavors makes it perfect for special occasions, holidays, or when you want to impress guests. Each layer is designed to complement the others, creating a dessert that’s as beautiful as it is delicious.
Optional garnishes like chocolate shavings, whipped cream, or a dusting of cocoa powder elevate the presentation, making it feel like a dessert from a high-end bakery.
The recipe scales beautifully for gatherings, and leftovers keep well in the refrigerator for up to three days. Let’s get started on creating this showstopping dessert!
Ingredients for boston chocolate cream pie cheesecake
Here's what you need to craft a decadent Boston chocolate cream pie cheesecake with perfect coffee-infused layers.
| Ingredient | Amount | Notes |
|---|---|---|
| Graham Cracker Crumbs 🍪 | 2 cups | Crushed into fine crumbs |
| Unsalted Butter 🧈 | ½ cup | Melted, cooled slightly |
| Granulated Sugar 🍚 | ¼ cup | For crust sweetness |
| Large Egg Yolks 🥚 | 2 whole | For custard binding |
| Heavy Cream 🥛 | 1 ½ cups | Full-fat for richness |
| Whole Milk 🥛 | ½ cup | For custard consistency |
| Instant Espresso Powder ☕ | 2 tbsp | High-quality for coffee depth |
| Vanilla Bean Paste 🌿 | 1 tbsp | Or pure extract if needed |
| Granulated Sugar (for custard) 🍚 | ½ cup | Balances coffee bitterness |
| Cream Cheese 🧀 | 32 oz | Room temperature, full-fat |
| Sour Cream 🥛 | ½ cup | For tangy richness |
| Dark Chocolate Chips 🍫 | 1 cup | 70% cocoa minimum |
| Large Eggs 🥚 | 4 whole | Room temperature |
| Powdered Sugar 🍚 | ½ cup | For cheesecake sweetness |
| Chocolate Shavings 🍫 | ¼ cup | For garnish, optional |
| Whipped Cream 🍦 | 1 cup | For garnish, optional |
The graham cracker crust sets the foundation—Hobbs or Honey Maid are my go-tos for that buttery, crispy texture. If you're short on time, pre-made crusts from Trader Joe's work in a pinch, but nothing beats fresh. For the coffee-infused custard, high-quality instant espresso powder like Starbucks or Lavazza makes all the difference—it dissolves smoothly without graininess. The custard layer needs patience: simmer it low and slow, then strain for that silky texture. And trust me, room-temperature cream cheese is non-negotiable—it blends so much smoother than cold lumps.
No vanilla bean paste? Pure extract works, but you'll miss that subtle complexity. For the chocolate cheesecake layer, 70% cocoa dark chocolate gives the perfect balance of richness and bitterness—Ghirardelli or Guittard are my top picks. Short on time? Melted chocolate chips (like Hershey's Special Dark) work in a bind, but they lack the depth of bars. The custard can be made a day ahead—store it in the fridge with plastic wrap pressed right on the surface to prevent a skin. And if you're feeling fancy, infuse the heavy cream with vanilla bean while heating it for the custard—game-changer.
This dessert is a showstopper, so handle it like one. Assemble everything the day of serving—the custard and cheesecake layers need time to set properly. Store any leftovers in the fridge for up to 3 days, but honestly? It disappears that fast. For a restaurant-quality finish, dust with powdered sugar and add chocolate shavings right before serving. The coffee flavor actually improves overnight, so make it ahead if you can—trust the process.
Why You'll Love This Recipe
- No-Fuss Layers: I swear by this recipe because it’s basically a no-brainer crust—just melt butter, mix with graham crumbs, and press. No rolling, no fuss, and the buttery graham base always holds up.
- Chocolate-Cream Obsession: That velvety chocolate cream filling? It’s the kind of rich, fudgy goodness you’d expect in a pie and a cheesecake, all in one bite. The heavy cream and yolks make it impossibly smooth—no one will guess it’s this easy.
- Party in a Box: Between us, this is my go-to for gatherings because it’s actually easy to scale. Double the crust, triple the filling—it’s still foolproof, and slices beautifully. (Yes, even when my niece “helps” by dropping a spoon in the batter.)
- Leftovers? Better: Honestly, I make this when I have company and when I don’t. The leftovers stay creamy for days, and the graham crust keeps it from getting soggy. Plus, it’s cheaper than buying a dessert—same indulgence, way less guilt.
Step-by-step instructions for Boston chocolate cream pie cheesecake
Here's how to build layers of coffee-infused custard and crispy crust that'll impress anyone.
Prepare the Crispy Graham Cracker Crust
Preheat your oven to 350°F and spread the 2 cups graham cracker crumbs evenly in a 9-inch springform pan. In a small bowl, melt the 0.5 cup unsalted butter and mix it with the 0.25 cup granulated sugar until combined. Pour this mixture over the crumbs and press down firmly with your fingers or the bottom of a glass to create an even, compact layer.
Bake for 10 minutes until the edges are golden brown and the crust smells toasty. Let it cool completely before adding the filling—this prevents a soggy bottom. I usually run a knife around the edges to help release it later. This crust is the foundation, so take your time pressing it evenly.
Make the Coffee-Infused Chocolate Custard
In a medium saucepan, combine the 1.5 cups heavy cream, 0.5 cup whole milk, 2 tbsp instant espresso powder, and 1 tbsp vanilla bean paste. Heat over medium heat until it just begins to simmer, then remove from heat and let steep for 10 minutes to infuse the coffee flavor. Strain through a fine-mesh sieve to remove any sediment.
In a separate bowl, whisk together the 4 whole large eggs, 0.5 cup granulated sugar (for custard), and 0.5 cup sour cream until smooth. Slowly pour the hot cream mixture into the egg mixture while whisking constantly to temper the eggs. This prevents scrambling and ensures a silky texture. Pour the custard mixture through a fine-mesh sieve into a clean bowl to remove any cooked egg bits.
Assemble and Bake the Cheesecake
Place the cooled crust in the refrigerator to chill while you prepare the cheesecake layer. In a large bowl, beat the 32 oz cream cheese until smooth and creamy, about 3-4 minutes with an electric mixer. Gradually add the custard mixture while mixing on low speed until fully combined. Fold in the 1 cup dark chocolate chips using a spatula, ensuring even distribution.
Pour the cheesecake batter over the crust and smooth the top with a spatula. Bake in the preheated oven for 45-50 minutes until the edges are set and the center is slightly jiggly. Turn off the oven, crack the door open, and let the cheesecake cool inside for 1 hour. This slow cooling prevents cracking. Remove from the oven and let it cool to room temperature before refrigerating for at least 4 hours or overnight.
Finish with Chocolate Garnish
Once fully chilled, run a knife around the edge of the springform pan to loosen the cheesecake. Top with a dusting of 0.5 cup powdered sugar and a sprinkle of 0.25 cup chocolate shavings. For an extra touch, pipe 1 cup whipped cream around the edges or on top. Serve chilled with additional chocolate shavings and a dollop of whipped cream on each slice.
The result should be a perfectly balanced dessert with a crispy, buttery crust, rich coffee-infused custard, and a velvety chocolate finish. Each bite delivers layers of flavor—sweet, bitter, creamy, and crispy—all in one perfect package.
Pro Tips For Making Boston Chocolate Cream Pie Cheesecake
- Preheat Your Pan: Slide that springform pan into the oven before mixing the crust—yes, even if it feels like overkill. I learned this the hard way when my crust turned into a sad, greasy puddle because the pan was cold. Five minutes at 350°F (175°C) makes the butter melt faster and keeps the crumbs from turning to dust.
- Whisk Those Yolks: Beat those egg yolks and sugar until they’re pale yellow and thick enough to leave a trail. I used to rush this, and the filling ended up grainy instead of silky. A hand mixer on medium-high for 3-4 minutes does the trick—don’t skip it, even if your arms protest.
- Chill the Filling: Pop the cream cheese mixture in the fridge for at least 30 minutes before baking. I was skeptical until I tried it—now I won’t bake it without this step. It prevents cracking and lets the flavors meld, so you’re not left with a dense, rubbery center.
- Water Bath, No Foil: Use hot water in the bath, not room temp, and fill it halfway up the pan. Wrapping the pan in foil traps steam and turns your cheesecake into a science experiment. The hot water keeps the edges from overcooking while the center sets—just monitor it after 45 minutes.
Essential equipment for boston chocolate cream pie cheesecake
Springform Pan
The 9-inch springform pan is your best friend for this recipe—it creates clean slices and makes removing the cheesecake effortless. I recommend a high-quality pan with a sturdy clamp, like the Nordic Ware Natural Aluminum or USA Pan.
These pans distribute heat evenly and prevent warping. If you don’t have one, a standard cake pan works in a pinch, but you’ll need to run a knife around the edges before serving. 🔥
Mixing Tools
For smooth, lump-free custard and cheesecake, invest in a high-quality electric mixer—I use my KitchenAid Artisan Series for consistent results. A fine-mesh sieve (like OXO Good Grips) is essential for straining the custard to achieve that silky texture.
For folding in chocolate chips, a spatula with a flexible edge (such as Microplane’s Silicone Scraper) ensures even distribution without overmixing. 💫
Measuring Tools
Precision matters when balancing coffee and chocolate flavors. Use a digital kitchen scale for accurate measurements of cream cheese and chocolate chips—OXO Good Grips is my go-to. For dry ingredients, a stainless steel measuring cup set (like Farberware) ensures consistency.
A thermometer (such as Thermoworks Thermapen) helps monitor custard temperatures to avoid scrambling the eggs. Every degree counts! ⚡
Baking Essentials
A reliable oven thermometer (like Thermoworks Oven Thermometer) ensures your oven stays at 350°F—critical for even baking. For the custard layer, a double boiler setup (or a heatproof bowl over a saucepan) prevents overheating.
I also keep a spray bottle with water handy to mist the oven walls if the air feels too dry during baking. This prevents cracks in the cheesecake’s surface. 🌡️
Garnishing Tools
Elevate your presentation with a microplane (like Microplane Zester/Grater) for perfect chocolate shavings. A piping bag with a star tip (such as Wilton’s 1M tip) makes whipped cream rosettes effortless.
For dusting powdered sugar, a fine-mesh sifter (like Norpro) ensures an even, professional finish. These small tools make a big difference in how restaurant-worthy your dessert looks. ✨
Nutrition facts
Frequently asked questions
Why does this recipe combine coffee-infused custard with chocolate cheesecake?
The coffee-infused custard layer pays homage to classic Boston cream pie, while the chocolate cheesecake adds modern depth. The coffee's bitterness balances the richness of the chocolate, creating a sophisticated flavor profile that's both nostalgic and innovative. This fusion makes each bite more complex and satisfying than either dessert alone.
Can I make this dessert ahead of time?
The crust can be prepared 1 day ahead, and the custard mixture can be made 24 hours in advance—just store it covered in the fridge. The cheesecake layer should be assembled and baked the day you plan to serve it, then chilled for at least 4 hours (overnight is ideal). The flavors actually improve with time!
What's the best way to prevent cracks in the cheesecake layer?
Cracks usually happen due to temperature shifts. To avoid them: 1) Let your oven cool slightly with the door cracked open after baking, 2) Don't open the oven door during the 45-50 minute baking time, and 3) Place the pan on a cooling rack instead of directly on the counter. A water bath (wrapping the pan in foil) also helps create a more stable bake.
How do I serve this dessert for a crowd?
For gatherings, scale the recipe up to a 12-inch pan (adjust baking time to 55-60 minutes). Serve slices on individual dessert plates with extra chocolate shavings, whipped cream, and a sprinkle of powdered sugar. For presentation, use a serrated knife dipped in hot water for clean slices. This dessert is naturally impressive enough to stand alone!
Can I substitute any ingredients?
For the crust, you can use 1.5 cups vanilla wafers instead of graham crackers. For the custard, substitute vanilla bean paste with 1.5 tsp pure vanilla extract. The chocolate cheesecake layer can use 16 oz cream cheese + 16 oz mascarpone for extra richness. Just remember: high-quality ingredients make the biggest difference in flavor!