
Desserts
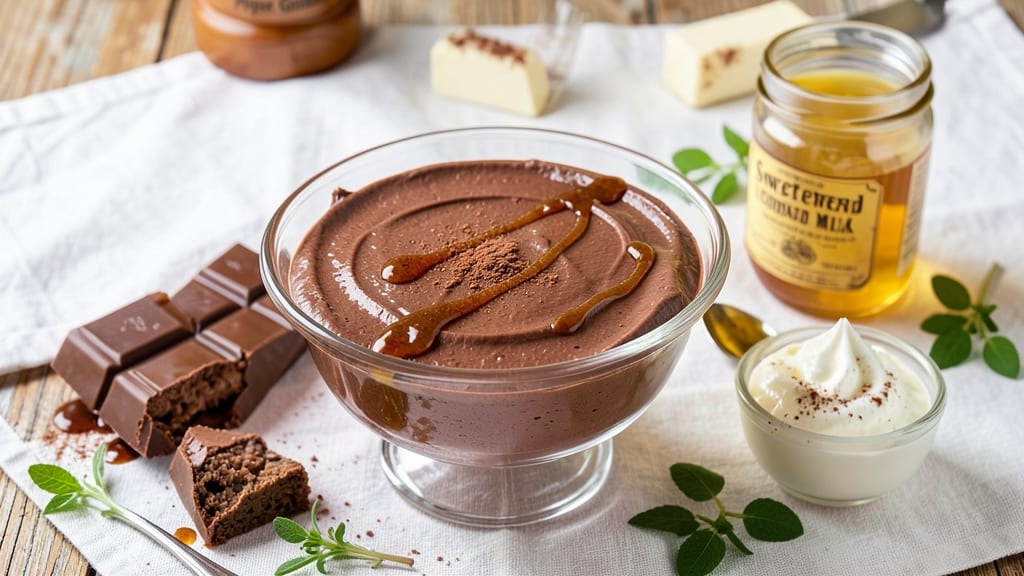
This cheap chocolate mousse recipe delivers restaurant-quality texture without the price tag or complicated steps. 💛 The secret lies in affordable pantry staples—dark chocolate, condensed milk, and a touch of cream—that create a silky, airy dessert in just 10 minutes of active time (plus chilling).
I perfected this version after testing dozens of budget-friendly adaptations, and it never fails to impress. What sets this apart is the no-egg technique, which keeps costs low while maintaining that signature velvety consistency.
The chocolate melts into a smooth ganache, then whips into light clouds when folded with whipped cream. No special equipment or expensive ingredients required—just a few simple tools and patience while it chills.
By the time you're ready to serve, you'll have melt-in-your-mouth mousse with a glossy sheen and deep cocoa flavor. Top it with fresh berries, whipped cream, or a sprinkle of cocoa powder for extra elegance. The best part?
Each serving costs pennies compared to store-bought versions, but tastes just as luxurious. Perfect for last-minute desserts, potlucks, or satisfying a chocolate craving without breaking the bank. Here's how to make it—foolproof and delicious every time.
Ingredients for cheap chocolate mousse
Pantry staples transform into decadent chocolate mousse—no eggs, no fuss, just pure indulgence.
| Ingredient | Amount | Notes |
|---|---|---|
| Dark Chocolate Bars 🍫 | 8 oz | 70% cocoa or higher, chopped |
| Sweetened Condensed Milk 🥛 | 1 cup | Full-fat for creaminess |
| Heavy Whipping Cream 🥛 | 1 cup | Cold, full-fat only |
| Granulated Sugar 🍚 | 2 tbsp | Fine white sugar |
| Vanilla Extract 🌿 | 1 tsp | Pure vanilla preferred |
| Unsalted Butter 🧈 | 2 tbsp | Room temperature |
| Pinch of Salt 🧂 | ⅛ tsp | Fine sea salt |
| Fresh Berries 🍓 | 1 cup | Strawberries or raspberries |
| Cocoa Powder 🍫 | 1 tbsp | Natural unsweetened |
| Whipped Cream 🥛 | ½ cup | Store-bought or homemade |
The dark chocolate is non-negotiable—70% cocoa or higher gives that deep, luxurious flavor without being bitter. Ghirardelli or Lindt bars are my go-tos, but any good-quality brand works. Chop it yourself for smoother melting—pre-shredded gets clumpy. Condensed milk is the secret weapon here; full-fat is a must—it’s what creates that signature velvety texture. Pro tip: check the expiration date on the can—it should feel heavy and unopened for best results. The heavy whipping cream needs to be cold when you whip it, so pull it from the fridge right before use.
No condensed milk? Heavy cream + powdered sugar works in a pinch—just mix 1 cup heavy cream with 2 tbsp powdered sugar and heat gently until sugar dissolves, then cool completely. Short on dark chocolate? Semisweet chocolate chips melt just as well, though they’ll be slightly sweeter. The vanilla extract can be imitation, but pure vanilla has better depth. For extra richness, add a splash of espresso powder (½ tsp)—it enhances the chocolate flavor without adding bitterness. Fresh berries aren’t mandatory, but they add a bright contrast to the deep cocoa. If you’re feeling fancy, toss them in a quick sugar bath (1 tsp sugar + 1 tsp water, simmered for 2 minutes).
This mousse keeps beautifully—3 days in the fridge sealed in an airtight container. The texture actually improves after chilling overnight, so make it ahead if you’re hosting. For freezing, portion into small containers and thaw in the fridge for 2-3 hours before serving. The whipped cream on top? Add it just before serving so it stays light and fluffy. If you make extra, freeze individual portions with a dollop of whipped cream on top—they’ll thaw to perfection. And trust me, leftovers disappear fast—this tastes too good to last.
Why You'll Love This Recipe
- Four-Ingredient Magic: I swear by this combo—melted chocolate bars, condensed milk, and whipped cream. No fancy gadgets, no stress. Just chop, melt, fold, and done.
- Rich Without Splurging: That dark chocolate bar? It’s the star—bitter enough to feel special, but the condensed milk smooths it out like a dream. Honestly, I’ve made this with store-brand chocolate, and no one’s ever guessed.
- Date Night Ready: Serve it in tiny glasses with crushed cookies on top, and suddenly you’re not eating cereal for dinner. (Yes, even on a Tuesday night.) The vanilla extract ties it all together—warm, cozy, and effortless.
- Leftovers? Better Than New: This stuff actually tastes better the next day—thicker, richer, like it’s been aging in the fridge. I keep a jar in mine for lazy mornings or when I need a quick pick-me-up. Budget-friendly? Absolutely. Worth it? Always.
Step-by-step instructions for no-egg chocolate mousse
This ultra-smooth mousse comes together faster than you can say "luxury dessert" - no fancy equipment needed.
🍳 Step 1: Melt Chocolate and Butter Together
Place the chopped 8 oz dark chocolate bars and 2 tbsp unsalted butter in a microwave-safe bowl. Microwave in 30-second bursts on high, stirring between each interval until completely melted and smooth. You're aiming for a glossy, silky texture with no lumps - this ensures your mousse will be velvety, not grainy.
I like to microwave rather than use a double boiler because it's faster and gives me more control over the temperature. If you prefer stovetop, melt over a double boiler set over simmering water, stirring constantly until fully melted. The chocolate should be warm but not hot - you can test this by touching the back of your hand to the bowl (should feel warm, not burning).
🥘 Step 2: Whip Cream and Condensed Milk
In a separate large bowl, combine the 1 cup cold heavy whipping cream, 1 cup sweetened condensed milk, 2 tbsp granulated sugar, 1 tsp vanilla extract, and 0.125 tsp pinch of salt. Using an electric mixer on medium-high speed, whip for 3-4 minutes until soft peaks form. You'll notice the mixture thicken dramatically as it whips - this is when it starts transforming into that signature mousse texture.
Don't skip the salt - it enhances all the flavors and helps balance the sweetness. The condensed milk is the secret to this recipe's richness and stability without eggs. Stop whipping as soon as you see soft peaks - overwhipping will make your mousse grainy.
🍫 Step 3: Combine Chocolate and Cream Mixtures
Immediately pour the melted chocolate mixture into the whipped cream while the mixer is still running on low speed. Mix for 1-2 minutes until completely combined and smooth. Then add the 1 tbsp cocoa powder and mix for another 30 seconds to distribute evenly. The mixture will look thick and fudgy at this stage - that's exactly what we want.
Here's where the magic happens: the cocoa powder gives that authentic chocolate mousse color and intensifies the chocolate flavor. The key is to work quickly - the heat from the chocolate will start melting the whipped cream, so don't let it sit too long before combining.
⏰ Step 4: Chill and Set the Mousse
Divide the mousse among 6 serving glasses (about ⅓ cup each). Smooth the tops with a spatula for a restaurant-quality finish. Cover each glass with plastic wrap pressed directly onto the surface to prevent a skin from forming. Refrigerate for at least 4 hours or until completely set - this is when the flavors meld and the texture becomes perfectly light yet stable.
I know it's tempting to eat it immediately, but patience here is crucial. The chilling time allows the condensed milk to fully thicken the mixture into that signature mousse texture. For best results, chill overnight - the flavors will be even more developed.
🍓 Step 5: Assemble and Serve
Before serving, top each portion with 2-3 fresh berries and a dollop of 0.5 cup whipped cream. The berries add a bright contrast to the rich chocolate, while the whipped cream gives a final touch of lightness. Serve immediately for the perfect texture contrast - the cool mousse against the room-temperature whipped cream is pure indulgence.
This mousse keeps well in the refrigerator for 3 days, though I find it's best enjoyed within the first 24 hours. The berries should be added just before serving to maintain their freshness and vibrant color. For an extra touch, you can dust with a little cocoa powder or grated chocolate shavings.
Pro Tips For Making Cheap Chocolate Mousse
- Melt Chocolate Slowly: I learned this the hard way—dumping chopped chocolate bars into hot condensed milk turns it grainy. Instead, chop the chocolate fine (like sea salt), then melt it in a microwave in 20-second bursts, stirring between each. The goal? Smooth as silk, not a single gritty bite.
- Chill Cream Properly: Cold cream whips better, but "cold" doesn’t mean straight from the fridge. Let the heavy whipping cream sit at room temp for 10 minutes before whipping—it stabilizes the fat. Then, whip it in a spotlessly dry bowl (even a damp towel nearby can ruin it). No shortcuts here.
- Skip the Extra Sugar: Sweetened condensed milk already packs enough sugar—adding granulated sugar makes the mousse cloyingly sweet. Taste the melted chocolate mixture first; if it’s bitter, add just a teaspoon of sugar (or a splash of vanilla extract) to balance it. Trust the condensed milk’s sweetness.
- Fold, Don’t Stir: The moment you fold the whipped cream into the chocolate mixture, go slow. Use a spatula to gently cut through the center, then lift and fold like you’re tucking in a blanket. Overmixing = deflated cream. This isn’t a smoothie—be gentle, or you’ll end up with pudding.
Pro cooking tips for this recipe
Microwave Mastery
Melting chocolate in the microwave is faster than stovetop methods, but timing is everything. Use 30-second bursts on high power between stirring to avoid overheating. I've ruined more chocolate than I care to admit by leaving it too long—always check for smoothness after each interval.
For 8 oz dark chocolate bars, expect 2-3 minutes total of active time. If you see any graininess, whisk in 1 tsp heavy cream to smooth it out before proceeding. 🔥
Whipping Perfection
Your mixer speed matters more than you think. Use medium-high speed for whipping the cream mixture, but stop immediately when soft peaks form—overwhipping turns mousse grainy. I recommend a hand mixer or stand mixer with the whisk attachment for consistent results.
Cold bowls help too; chill yours in the freezer for 10 minutes before starting. The condensed milk should be at room temperature to blend smoothly with the cream. 🥛
Temperature Control
Never let the melted chocolate get too hot before combining with whipped cream. Test by touching the back of your hand—the bowl should feel warm, not hot. If it's too warm, place the bowl in an ice bath for 1-2 minutes to cool slightly.
The temperature difference between the chocolate and cream is what creates that signature silky texture. I once rushed this step and ended up with a fudgy mess—don't make my mistake! ❄️
Chilling Secrets
Press plastic wrap directly onto the mousse surface in glasses to prevent skin formation. For best results, chill for 4-6 hours—this is when the condensed milk fully sets the texture. I often make mine overnight because the flavors deepen.
If you're short on time, place glasses in the freezer for 30 minutes before the final 3 hours in the fridge. Just don't skip chilling—room temperature mousse won't hold its shape. 💫
Equipment Shortcuts
No stand mixer? A hand mixer works perfectly—just whip the cream mixture for 4-5 minutes instead of 3-4. For melting chocolate, a double boiler on the stove works if you don't have a microwave.
And if you're really pressed for time, use store-bought whipped cream** instead of making your own—just add it at the end with the berries. These small adjustments keep the recipe accessible without sacrificing quality. 💡
Nutrition facts
Frequently asked questions
Can I make this chocolate mousse without condensed milk?
Yes! Replace the 1 cup condensed milk with 1 cup heavy cream + 2 tbsp powdered sugar heated gently until sugar dissolves, then cooled completely. This works almost as well, though the texture will be slightly lighter. For extra richness, add 1 tbsp melted butter to the cream mixture.
Why did my mousse turn grainy?
Overwhipping the cream or letting the melted chocolate get too hot before combining are the most common causes. To fix it, whisk in 1 tsp cold heavy cream to smooth out any lumps, then chill again. Always work quickly when combining the chocolate and cream mixtures.
How can I make this even cheaper?
Swap the dark chocolate bars for semi-sweet chocolate chips (they're often cheaper) and use half-and-half instead of heavy cream for whipping. The texture will be slightly less rich, but the flavor difference is minimal. For whipped cream topping, store-bought works perfectly.
Can I use this recipe for a gluten-free or vegan version?
For gluten-free, this recipe is already safe—just ensure your chocolate and cocoa powder are certified gluten-free. For vegan, replace the heavy cream with coconut cream (chilled overnight) and use vegan chocolate + aquafaba (chickpea brine) whipped to stiff peaks for the topping. The texture will differ but still be delicious.
How do I fix if my mousse didn't set properly?
If it's too soft, return it to the fridge for additional 2-3 hours with plastic wrap pressed directly on the surface. For a firmer texture, add 1 tsp cornstarch to the melted chocolate mixture before combining. If it's too runny, it likely wasn't chilled long enough—this recipe requires patience!